Pluginic
Topics :
Unlock powerful features to grow our business!
Get The PRO 🚀Info Box: Make Key Information Stand Out with Ease
Updated:In This Article :
The FancyPost Plugin's Info Box block helps you highlight important information on your website. You can put key details in a special box that stands out, making it easy for visitors to notice. You can customize the colors and icons in the Info Box, so it matches your website's style and draws attention to the most important parts.
Using the Info Box block in the FancyPost Plugin makes your website more user-friendly and visually appealing. By highlighting key details, you help visitors quickly find the information they need. This is especially useful for important announcements, special offers, or key points in your content. The customization options let you make the Info Box look exactly how you want, ensuring it fits perfectly with your website’s design.
Step-by-Step Guide to Implementing 'Info Box'
Want to highlight important information on your WordPress site? The "Info Box" block in the FancyPost Plugin makes it easy! Here’s how to set it up and customize it to grab your visitors' attention:
Step 01:
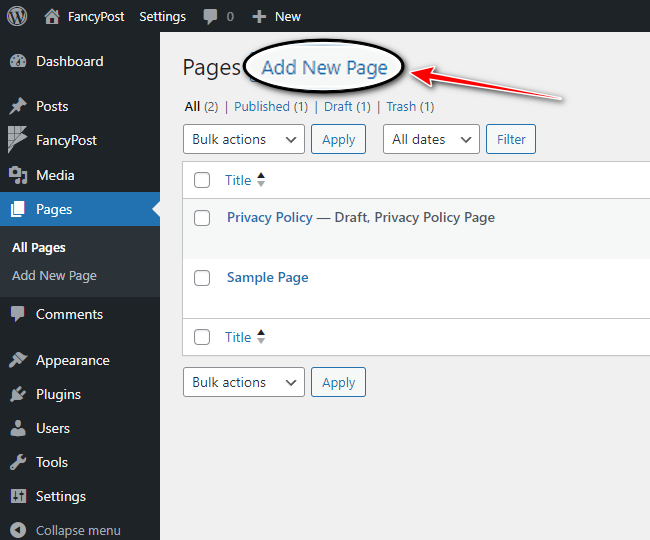
Go to your WordPress dashboard and click on "Add New Page."
Step 02:
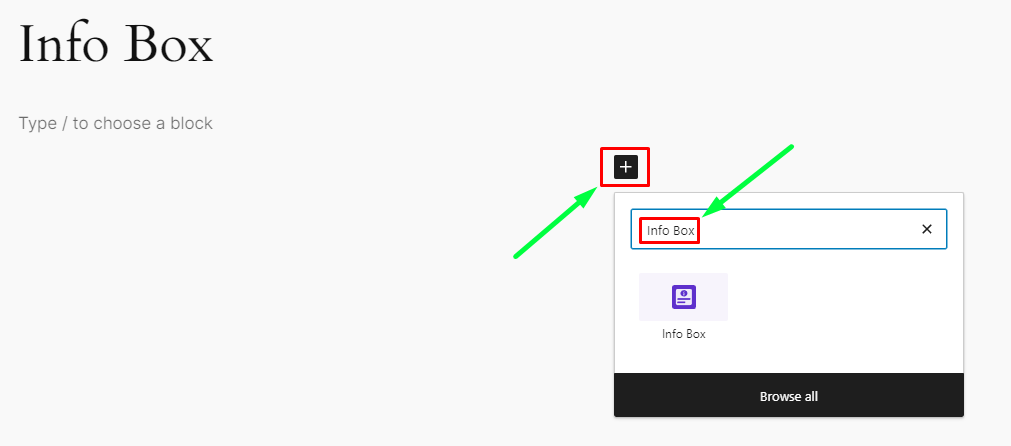
Next, click on the '+' icon on the right side. In the search box, type "Info Box" and click on the search icon.
Step 03:
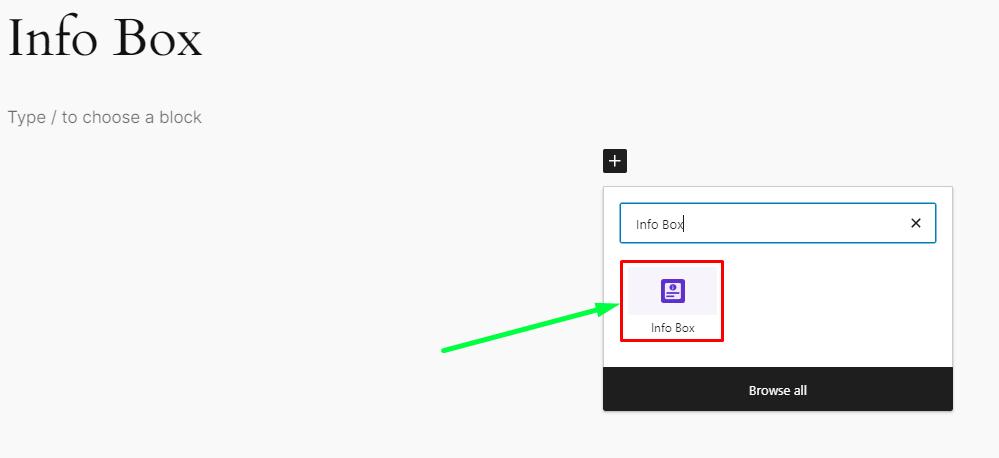
Now, we will discuss how "Info Box" works. From all the blocks, click on "Info Box."
Step 04:
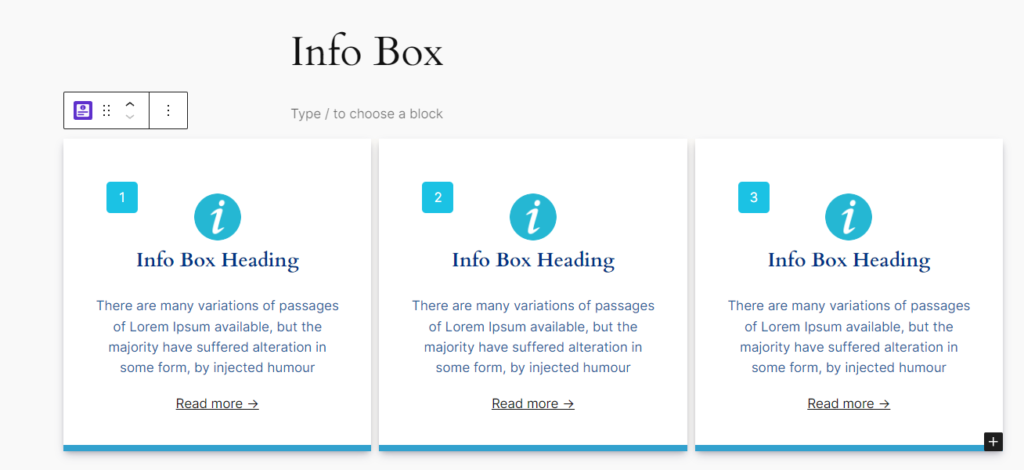
The Info Box is a customizable block in the FancyPost Plugin that highlights important information on your website. You can adjust colors and icons to make key details stand out. This makes it easy for users to notice important information.
Step 05:
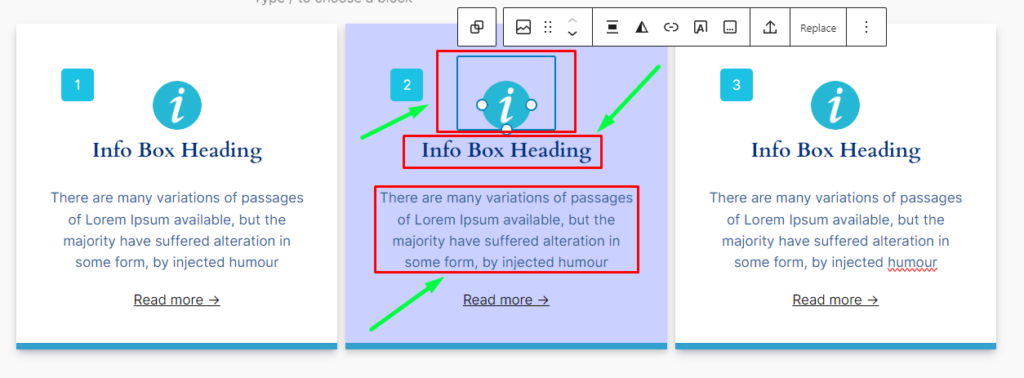
Customizing the "Info Box" is simple. You can edit or replace each element of the box, such as icons, headings, and paragraphs, without needing any coding skills. It's user-friendly and easy to use.
Step 06:
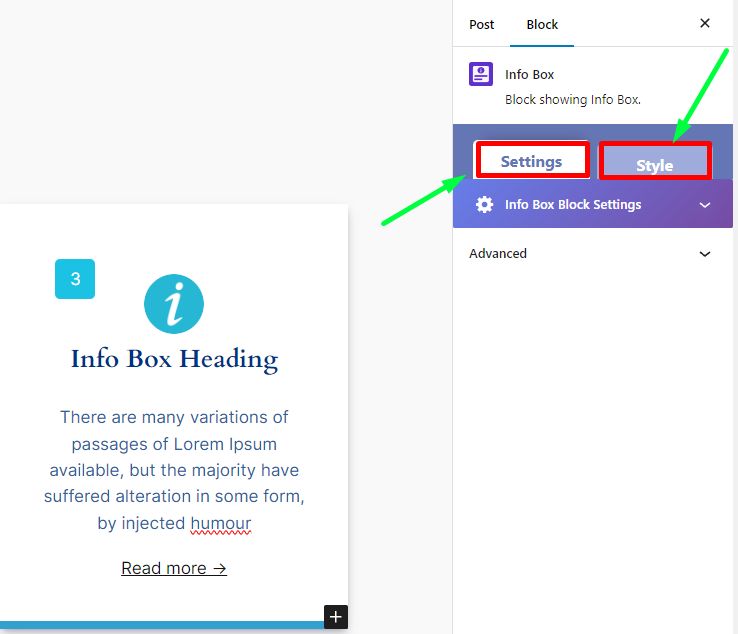
To customize the "Info Box," there are two options on the right side: "Setting" and "Style." Using these options, you can beautifully edit and customize the "Info Box."
Step 07:
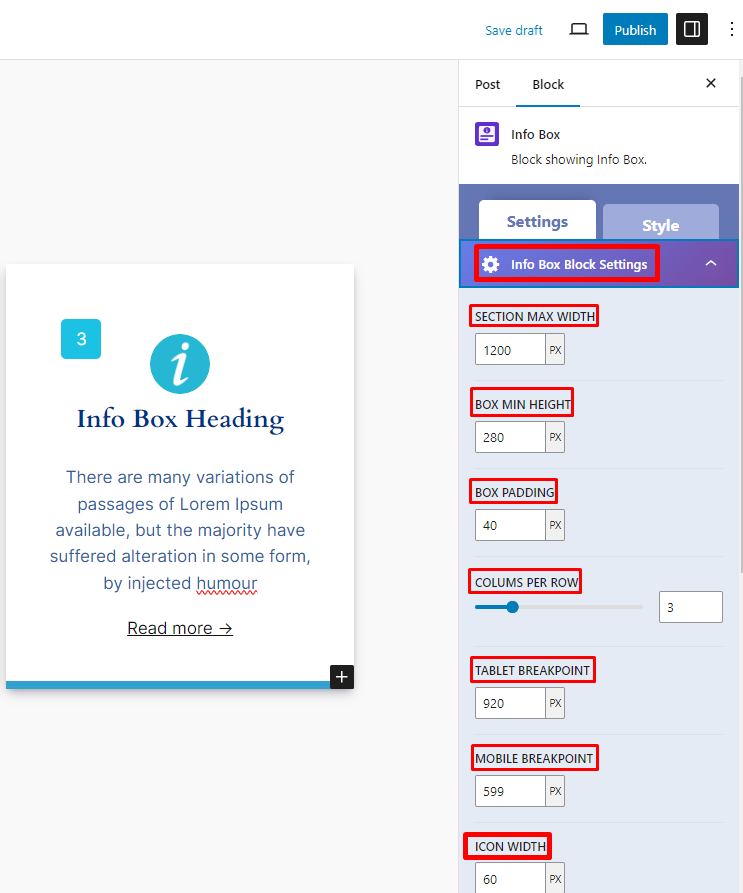
The first customization option is "Info Box Setting," located under "Setting." You can use the options like "SECTION MAXIMUM WIDTH," "BOX MIN HEIGHT," "BOX PADDING," "COLUMNS PER ROW," "TABLET BREAKPOINT," "MOBILE BREAKPOINT," "ICON WIDTH," and "ICON HEIGHT" to easily customize the "Info Box."
Step 08:
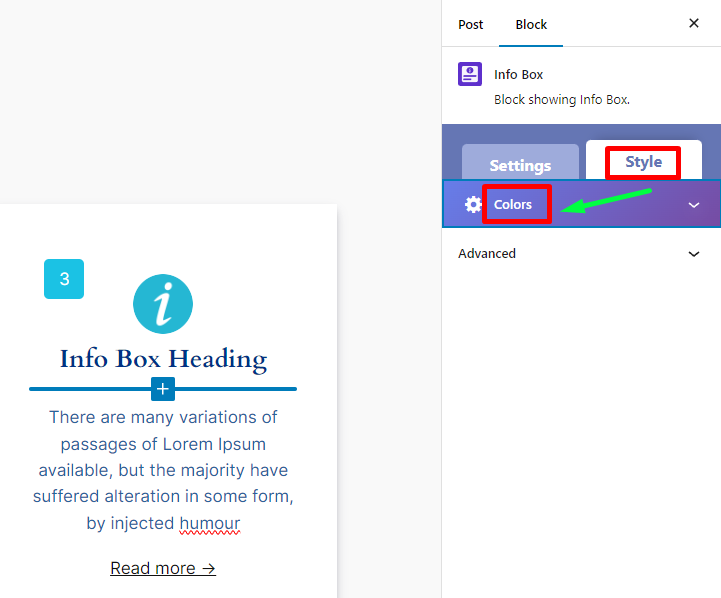
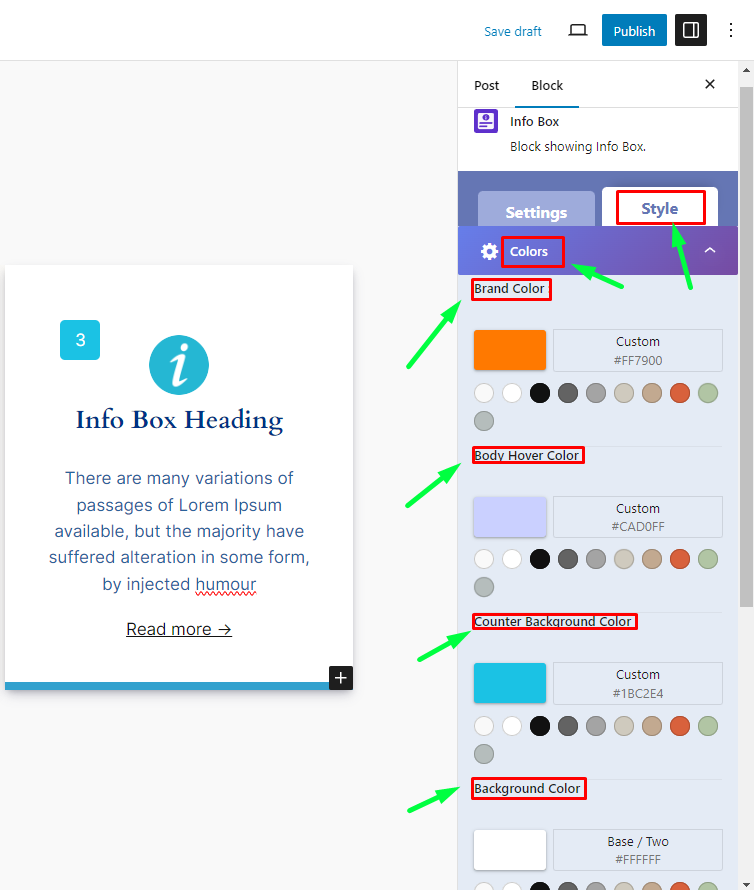
The "Style" section on the right side includes various "Colors" customization options.
Step 09:
From the color customization options, you can change "Brand Color," "Body Hover Color," "Counter Background Color," "Background Color," "Heading Color," and many more. These options allow you to easily change the color of the "Info Box." The interface is so user-friendly that even a beginner can easily customize the "Info Box."
Step 10:
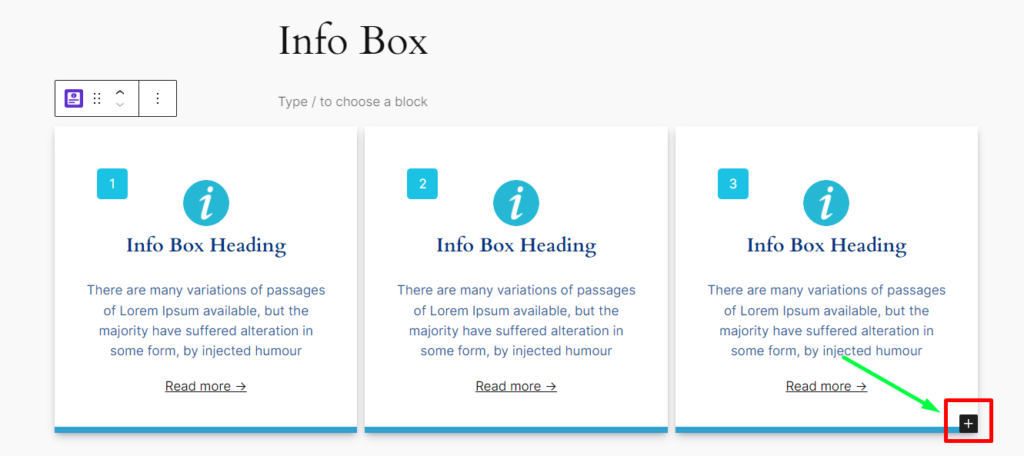
If you feel the need to add more "Info Boxes" to your page, simply click on the '+' icon below the existing "Info Box" to add new ones.
Step 11:
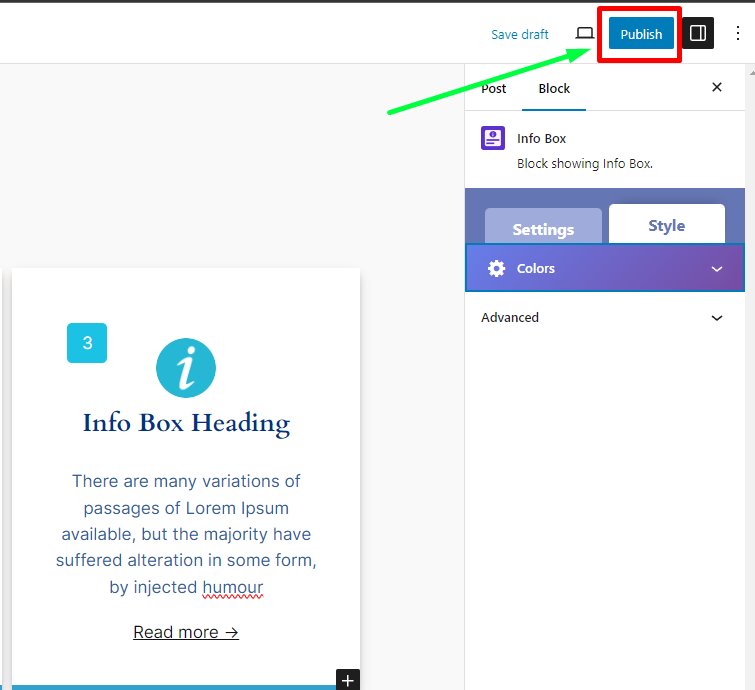
Once you have finished customizing your Info Box, click the "Publish" button to make your changes live.
Using the Info Box feature not only enhances the visual appeal of your website but also helps draw attention to important information, improving user engagement and experience.
Need Custom Solutions?
We bring you the most affordable WordPress development and customization services, provided by our expert developers to craft your site.

